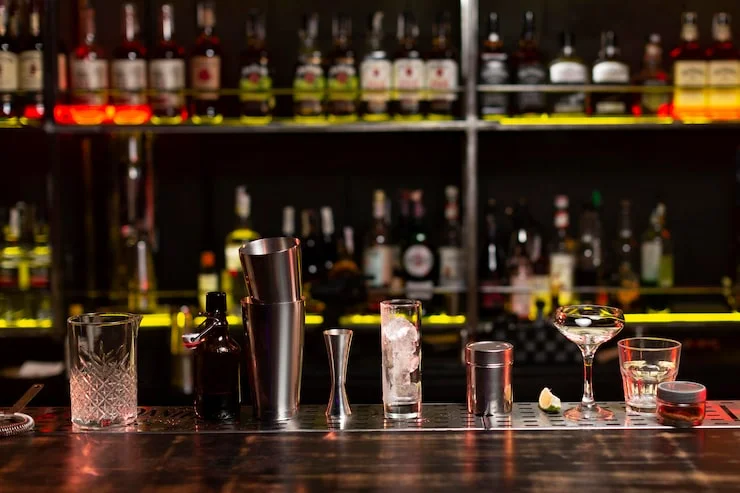
You do not need a spare room to have a bar at home. A small bar works in a corner, along an empty wall, inside a closet, or on a cart that rolls away when guests leave. The trick is picking a setup that fits your actual square footage and the way you already live. This article walks through twelve design ideas you can build or buy, with notes on what each one demands from your space and your small home bar design ideas.
Before you scroll, one question matters more than any style choice: how much floor space can you give up permanently? If the answer is none, start with the cart or the wall shelf. If you have a dead corner or a narrow alcove, the built-in options will serve you better. Every idea below assumes you are working with roughly two to six square feet of usable area.
Start with a bar cart if your space must stay flexible
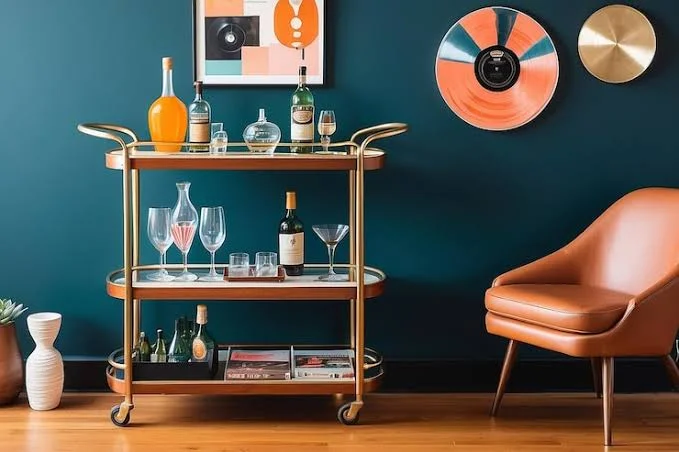
A cart is the lowest-commitment option and the one most small-home dwellers should try first. A three-tier rolling cart holds bottles, glassware, and a small ice bucket on separate levels. You roll it against a wall when not in use and pull it beside the sofa or kitchen counter when you entertain.
Choose a cart with locking casters. A cart that slides while you are pouring is a hazard. Metal carts with raised edges catch spills better than flat wood shelves. Keep the heaviest bottles on the bottom tier so the cart does not tip when you open a drawer or bump it. If your floor is uneven, measure the wheel diameter before buying; small hard wheels rattle on tile and scratch wood.
The cart idea fails in one situation: if you own more than about fifteen bottles, the cart becomes a storage problem rather than a bar. At that point, look at the wall-mounted shelf or the converted closet below.
Read Also: Small Home Bar Ideas For Dining Room Corner
Turn a blank wall into a floating bar shelf
A single deep shelf mounted at counter height gives you a work surface and storage in one move. You need about thirty to thirty-six inches of wall width and a stud finder. The shelf should be at least ten inches deep to hold standard bottles upright and a small tray for tools.
Mount the shelf so the top sits at roughly thirty-six inches from the floor. That height lets you stand and pour without bending, and it clears most baseboards and furniture below. Add a second shelf eight to ten inches above the first if you want glassware within reach. Use brackets rated for at least fifty pounds; a row of full bottles gets heavy fast.
This idea works best in a hallway, beside a kitchen entry, or on the wall opposite a sofa. It does not work on plaster walls without proper anchors, and it does not work if you rent and cannot drill. For renters, see the tension-rod or leaning shelf options instead.
Convert a closet or alcove into a hidden bar
A shallow closet, a coat nook, or the space under a staircase can become a bar that disappears behind a door. Remove the hanging rod if there is one. Add a counter-height shelf or a small cabinet base. Paint the interior a dark color so bottles and glassware stand out against it. Install a battery-powered puck light or a strip light on the underside of a shelf.
The closet bar keeps your main room free of visual clutter. It also protects bottles from direct sunlight, which degrades wine and some spirits. The tradeoff is ventilation: a closed closet with no airflow can get musty, and you will smell it on glassware. Leave the door open for an hour after you use the bar, or install a small vent if the closet has no gap under the door.
Measure the door swing before you commit. A closet bar that blocks a bathroom door or a bedroom door when open is a daily annoyance. If the door swings outward into a hallway, confirm it does not hit anyone walking past.
Build a corner bar with two angled shelves
A dead corner between two walls is wasted space in most small homes. Two triangular shelves stacked in that corner create a bar footprint of about eighteen inches on each side. Cut the shelves from a single plank, or buy ready-made corner shelves. Mount the lower shelf at thirty-six inches and the upper shelf at fifty-four inches.
The lower shelf holds bottles and a small tray. The upper shelf holds glasses upside down on a cloth or a rack. A corner bar like this fits in a kitchen, a dining nook, or the end of a hallway. It does not give you a place to sit, but it gives you a place to pour and set a drink down while you talk.
Use corner brackets that attach to both walls if possible. A shelf anchored to only one wall in a corner will sag toward the open side once you load it with bottles. Check that the corner is actually square before you cut anything; old houses rarely are, and a pre-cut triangular shelf may leave a gap on one side.
Use a bookshelf with the bottom shelves cleared
A standard bookcase, two feet wide and five shelves tall, can hold a bar on its lower two or three shelves. Clear the bottom shelf entirely for bottles and a tray. Use the second shelf for glassware and tools. Keep books or decorative objects on the upper shelves. The bar reads as part of the furniture rather than a separate station.
This idea costs nothing if you already own a bookcase. It works in a living room, a bedroom, or a dining area. The limitation is depth: most bookcases are eleven to twelve inches deep, which is enough for bottles but tight for a cocktail shaker and a cutting board. Measure your tallest bottle and your shaker before you assign shelves.
Put a shallow tray on the bottle shelf to catch drips and to let you pull everything forward at once. A tray with a one-inch lip is enough. Without a tray, rings from wet bottles will mark the shelf within a month.
Mount a fold-down counter that disappears
A fold-down bar counter attaches to the wall with hinges and drops flat when not in use. When raised, it gives you a mixing surface roughly twenty-four inches wide and twelve inches deep. When lowered, it takes up four inches of wall depth. This is the most space-efficient option for a studio apartment or a room where every inch counts.
The hardware matters more than the wood. Use heavy-duty folding shelf brackets rated for at least sixty pounds. The counter itself should be a solid wood board or a piece of butcher block, not particle board; particle board will swell if a drink spills on the exposed edge. Seal the wood with a food-safe oil or polyurethane before mounting.
A fold-down counter does not hold bottles. You still need a shelf above it or a cabinet beside it for storage. The counter is the workspace, not the bar. Pair it with a narrow wall shelf twelve inches above for bottles and small home bar design ideas.
Repurpose a dresser or sideboard as a bar cabinet
A low dresser with drawers gives you hidden storage and a flat top in one piece of furniture. Clear the top for bottles, a tray, and a lamp. Use one drawer for tools and napkins, another for extra glassware. The bar looks intentional rather than improvised.
Choose a dresser no taller than thirty-six inches so you can reach the back of the top surface. A taller piece forces you to reach up and over, which gets tiring when you are hosting. If the dresser has a mirror attached, remove it or cover it; a mirror behind a bar reflects clutter and makes the space feel busier.
Line the drawer you use for bottles with a rubber mat. Bottles sliding in a drawer will chip glass and scratch wood. A roll of shelf liner costs a few dollars and prevents most of the damage.
Hang a wall-mounted rack for bottles and glasses
A metal or wood rack mounted on the wall holds bottles horizontally or vertically and often includes a hanging rail for stemware. This is the smallest footprint of any idea on this list: the rack projects only six to eight inches from the wall. It suits a kitchen wall, the side of a refrigerator, or a narrow strip beside a window.
Wall racks work best for wine bottles and a few spirits. They do not hold a shaker, a jigger, or a cutting board. Treat the rack as bottle storage and pair it with a small tray on a nearby counter or shelf for tools. If you hang stemware from the rack, check that the glasses clear the wall by at least an inch; glasses that knock against the wall will chip.
Mount the rack into studs or use toggle bolts rated for the loaded weight. A rack with six full wine bottles weighs thirty to forty pounds. Drywall anchors alone will pull out.
You May Also Like: Compact Home Bar for Small Apartments
Set up a bar tray on an existing surface
If you have a kitchen counter, a dining table, or a console table, a large tray defines a bar zone without adding furniture. Choose a tray with a lip, at least eighteen by twelve inches. Put bottles on one side, tools in a small cup, and a stack of napkins on the other. The tray contains spills and lets you move the whole bar if you need the surface for something else.
The tray idea is the cheapest and fastest option here. It also works in a rental where you cannot drill or mount anything. The limitation is that it competes with whatever else uses that surface. A kitchen counter tray bar disappears under mail and grocery bags within a week unless you commit to keeping the tray clear.
Pick a tray with handles. A tray without handles is hard to lift when loaded, and you will end up dragging it across the counter, which scratches both the tray and the surface.
Use a narrow console table behind a sofa
A console table ten to twelve inches deep fits behind a sofa or against a wall in a hallway. The top becomes a bar surface. Add a lower shelf or a basket underneath for bottles. This gives you a standing-height bar in a living room without taking floor space from the seating area.
Measure the gap between the sofa back and the wall before you buy. You need at least fourteen inches of clearance to stand and pour comfortably. If the console sits flush against the sofa back, you will be reaching over the cushions to make a drink, which gets old fast.
A console bar works best in an open-plan room where the living area and kitchen flow together. In a narrow room, the console plus the sofa depth can make the walkway too tight. Mark the footprint on the floor with painter's tape for a day before you commit.
Install a bar sink only if you will use it
A small bar sink, twelve by twelve inches, set into a counter or a converted dresser, lets you rinse glasses and dump ice without walking to the kitchen. It requires plumbing: a water supply line and a drain. In a rental, that usually means a pump system that drains upward into an existing sink trap.
Skip the sink unless you host often and your kitchen is far from the bar area. A sink adds cost, complexity, and a failure point (leaks) that a tray and a small rinse bucket do not have. For most small-home bars, a covered ice bucket and a bus bin for dirty glasses handle the same job with no plumbing.
If you do install a sink, put it on the side of the counter where you pour, not behind the bottles. Reaching across bottles to rinse a glass leads to knocked bottles and broken glass.
Add lighting that makes the bar usable at night

A bar needs light on the work surface, not just ambiance. A battery-powered puck light stuck under a shelf, or a small clip lamp on the wall above the bottles, lets you see what you are pouring after dark. Avoid string lights alone; they look festive but cast uneven light and leave the bottle labels in shadow.
A single warm-white LED strip on the underside of a shelf costs under twenty dollars and runs on batteries or a USB plug. Mount it toward the front edge of the shelf so the light falls on the bottles and the counter below, not into your eyes. If the bar is in a living room, put the light on a separate switch or a touch-sensitive strip so you are not lighting the whole room to make one drink.
What to keep on the bar and what to store elsewhere?
A small bar fills up fast. Keep only what you use in a typical week on the surface: two to three spirits, one mixing tool, one jigger, and glasses for two to four people. Store backup bottles, specialty liqueurs, and extra glassware elsewhere. A bar crowded with twelve half-empty bottles leaves no room to set down a drink.
Put a small trash bowl on the bar for citrus peels and bottle caps. A bowl that lives permanently on the tray prevents the instinct to leave peels on the counter, which attracts fruit flies within a day. Empty it after each use.
Frequently asked questions
How wide should a home bar be?
A usable wall-mounted or cart bar needs at least twenty-four inches of width for bottles and a small work area. Thirty-six inches is comfortable for two people to stand side by side. Anything narrower than twenty-four inches becomes bottle storage only, with no room to set down a glass.
Can I build a home bar in a rental?
Yes. Use a rolling cart, a bar tray on an existing surface, a freestanding bookshelf, or a leaning shelf that does not require wall mounting. Fold-down counters and wall racks require drilling, which most leases prohibit without permission.
Do I need a sink in a small home bar?
No. A small rinse bucket or a bus bin for dirty glasses handles the same job without plumbing. Install a sink only if your kitchen is far away and you host often enough to justify the cost and the leak risk.
How do I keep bottles from falling off a cart?
Choose a cart with raised edges or add a shallow tray with a lip. Keep heavy bottles on the bottom tier. Lock the casters when the cart is in use.
What is the smallest possible home bar setup?
A single wall shelf eighteen inches wide and ten inches deep, mounted at counter height, holding three bottles and a small tray. That footprint takes no floor space and costs under fifty dollars including brackets.
Conclusion
The best small home bar is the one you will actually use, not the one that looks best on a mood board. Start with the cart or the tray if you are unsure. Move to a wall shelf or a converted closet once you know you pour drinks at home regularly. Measure your space, check your wall type, and buy hardware rated for the weight you plan to put on it. A bar that holds three bottles securely is better than a bar that holds fifteen and falls off the wall.


